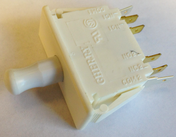
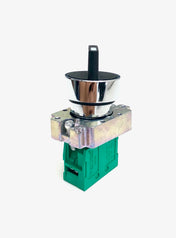
Your pizza oven is the most important piece of equipment in your pizza shop, when and how to clean and maintain your Middleby Pizza Oven is important to keep your establishment running smoothly. Without proper maintenance you run the risk of high repair and replacement costs. If you do skip any maintenance or you find out you need high quality pizza parts, feel free to shop our middleby parts catalog to find the part you need.
What maintenance should you be doing daily?
Exterior
Clean the outside of the oven with a mild detergent and a soft cloth. Rinse off the detergent with a wet cloth then wipe dry.
Fans and Grills
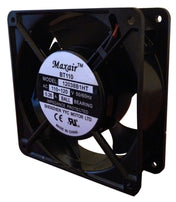
Clean the grill fans, there are two cooling fans on the upper oven and two on the lower oven that are located in the back of the oven. Use a stiff nylon brush to clean the grills for the cooling air exhaust that should be cleaned daily, one is on top of the upper oven and one is beneath the front of the lower oven.
When starting the oven check if the fans are operating correctly, if they are not, they must be repaired or replaced immediately.
The ventilating hood air filters should also be cleaned daily.
Conveyor Belts (Tandem and Double Tandem Ovens Only)
Brush off all the crumbs off the conveyor belt with a brush at the unloading end of the oven. Allow the crumbs to fall into the pan below.
Remove and clean the crumb pans at both ends of the oven. Reinstall the pans after cleaning.
Window
The window should ;be cleaned from the inside and out. If the window needs a thorough cleaning you can remove the window by unscrewing the window knobs from each end then pushing the window inside the oven, turn it sideways while its inside the oven then remove it.
What maintenance should you be doing monthly?
Disassembling the oven for maintenance:
Conveyor
To remove the conveyor you must first remove the crumb pans then the extension covers from both ends of the oven. Then unscrew the three screws located below the shroud to remove the bottom shield. Loosen the hanger screw and lift and remove the motor shroud. From the oven side with the conveyor drive motor, remove the end plugs.Next release the tension from the conveyor drive chain. For tandem and double tandem ovens lift and push the conveyor assembly slightly into the oven. For tri tandem and quad tandem ovens, loosen the mounting bolts of the conveyor drive motor, shift the motor to release the drive chain tension. Detach the drive chain from the drive shaft sprocket. Remove the conveyor belt by pulling it until the links are near the end of the upper belt surface, then roll it up into a bundle. Slide the conveyor frame sections out of the oven.
Blank plates and air fingers
As you remove each plate and parts for the air fingers, mark them with identifiers for easy re-assembly. To remove, slide each blank plate and air finger on the rear baking chamber wall along the channels until they can be removed from the oven. Be sure to remove the top and bottom blank plates and air fingers. Once the air fingers are removed, place it upright and step on the lip of the finger manifold and pull the outer plate upward to disassemble. Clean the outer plate with a strong detergent and hot water. Clean the conveyor belt the same way. The inner plate is removed by pulling at its end away from the finger manifold then lift out and up.
Once the oven chamber is cleared out, use a vacuum cleaner to clean it out, then wipe if down with a damp cloth.
Reassembly and Installation
Air fingers
Be sure to match the finger arrangement and reassemble the inner plate back into the finger manifold. The air fingers are designed to only go in one way. The outer plates are reassembled by sliding downward in the grooves on the side walls. Slide each air finger and blank plates back into the oven on the rear oven wall. The outer end of the finger should be supported as you push the base of the finger manifold portion along the channels. Be sure to put each finger back into its original location. Make sure each airfinger and blank plate interlock.
Conveyor belt
Install the belt and check the belt tension by lifting the belt, it should lift no more than 3’ to 4”. If there isn't enough tension remove one entire link.
What maintenance should you be doing every 3 months?
Blower motors
First remove the end panels from the machinery compartment. Then using an air compressor of CO2 thoroughly blow out the blower motors in each oven section and surrounding area.
Electrical terminals
Loosen the two screws on the control panel door and tighten all electrical control terminal screws.
What maintenance should you be doing every 6 months?
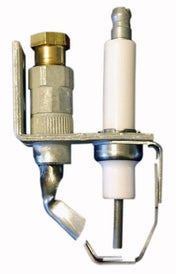
The brushes of the conveyor drive motor should be checked, when the wear is down to 3/32” they must be replaced. The burner nozzle, electrode assembly, and venting system should be cleaned and inspected.
Your Middleby Pizza Oven Parts Source
Doing proper maintenance on your Middleby Oven will ensure a smooth and efficient operation. Here at SyberParts, we have knowledgeable experts ready to answer any questions regarding conveyor ovens as well as products fit for your business needs. We offer resources to guide you in fixing your oven quick and with low cost and sometimes even free. Contact us if you need any assistance in locating the parts you need.