Middleby conveyor pizza ovens are one of the most expensive things in a pizza business and like other restaurant equipment, Middleby pizza ovens should be maintained on a regular basis to make sure that the oven lasts a long time. The following preventative checklist that Middleby recommends will make your Middleby oven last longer and will perform to top specifications. Set a schedule to perform the following checklist to keep your ovens running smoothly, year after year. To ensure further damage is done, disconnect power from the oven before starting the maintenance checklist.
Simple 25-point preventative maintenance checklist for your pizza oven
1. Check and clean machinery and control compartment
By opening the control compartment, use an air compressor to blow out the dust and other food particles to prevent heat and other issues. If this is the first time you do this with an older oven, use a very thin and soft brush to remove the debris while you air spray.
This could be done by a pizza store owner easily and quickly.
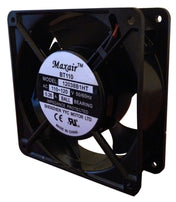
2. Check and clean main blower motors
Blower motors should also be cleaned free of dust and debris using the same air compressor technique. The main blower is located in the rear of the oven and May be difficult to access.
3. Check and clean axial fans
Axial fans are fans that cool down the electronics and control compartment and should be clean of dust or debris. While the oven is off, use an air compressor to spray down the fans and possible clean with a moist towel. If the axial fan makes noise when spinning or not spinning at all, consider replacing the cheap Middleby axial fan to avoid further damage to the costly control electronics.
This could be done by a pizza store owner easily and quickly.
4. Check burner blower motor and fan operation
The burner blower, blows the hot air into the oven and should be checked to make sure the blower doesn't make excessive noise. Using the air compressor technique, spray down the blower motor and fan. Replacing a burner blower motor involves some work but can be done within a few hours. Check out our burner blower motor for an easy and direct swap.
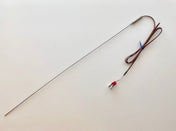
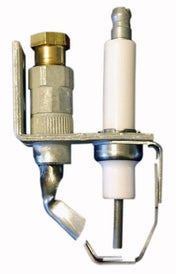
5. Check and clean igniter assembly
Make sure to carefully clean the igniter assembly if dirty.
6. Check and clean all orifices
This involves a good amount of time and should be done to allow for good and even distribution flow of gas.
7. Install pilot tee if oven is not so equipped
8. Check gas pressures, adjust as necessary
Having high pressure gas is dangerous and May damage the combination gas control valve. Decrease the pressure by adding a pressure reducer.
If you have low gas pressure, it May be necessary to increase it for your oven to operate properly. This is slightly more challenging and you have to contact the gas utility.
9. Check air-fuel mixture, adjust as necessary
10. Check ignition cable for signs of deterioration
Cuts or highly discolored ignition cable is a sign that it needs to be replaced. These ignition cables are inexpensive and easy to replace. Since the ignition cable relays high voltage, make sure the oven is off for a few minutes before attempting this change.
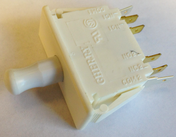
11. Check and tighten all electrical connections
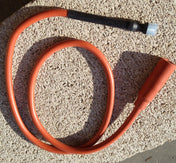
12. Inspect conveyor belt for damage, repair as necessary
The pizza oven conveyor belt is crucial in making sure the pizza gets from one side of the oven to the other. The belt is made out of steel and lasts a long time but may have issues if unmaintained. Conveyor belts May stretch and links could fall apart with a long time of operating. If there are any stretching or some links are breaking off, consider replacing the belt for a trouble free operation.
13. Inspect conveyor frame pivot plates
14. Inspect conveyor shaft bushing - replace drive side bushing
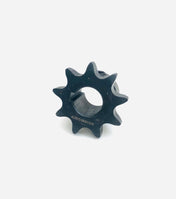
15. Check conveyor drive chain tension, adjust as necessary
The chain rotates the belt and gets powered by the conveyor motor. Sometimes the sprocket holding the chain changes positions and you May have too much slack or not enough slack in the drive tension. If theres too much slack, or the chain is too tight, adjust in order to keep the chain operating smoothly with a long life.
16. Verify proper air finger arrangement, correct as required
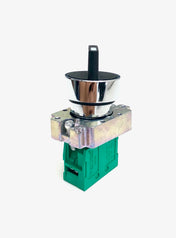
17. Inspect and clean (vacuum) conveyor motor and motor brushes
The conveyor motor rotates the sprocket, moving the chain, and thus moving the conveyor belt. The motor helps keep the pizza moving on the belt. Clean off any gunk or dust from the motor and check the motor brushes. If the brushes have less than 1/4 of lengh left, consider replacing now. The conveyor motor brushes are low cost when purchased ahead online and replaced at your convenience versus when it breaks down during rush hour and you'll need a costly repair visit.